Настройка и установка Zabbix на RHEL / CentOS 7
Zabbix – это инструмент мониторинга с открытым исходным кодом для мониторинга серверов и сетевых компонентов, подключенных к сети.
Он позволяет проверять службы, такие как SMTP, IMAP, HTTP и FTP. Объясняется установка и настройка Zabbix.
Особенности
- Веб-интерфейс администрирования.
- Мониторинг использования ЦП.
- Бесконтактный мониторинг.
- Мониторинг сетевых устройств с помощью агентов snmp.
- Мониторинг оборудования.
- Мониторинг гипервизора Vmware и виртуальных машин.
Включите epel и необходимые репозитории, как показано ниже:
 # yum install epel-release -y
Loaded plugins: fastestmirror, langpacks
Loading mirror speeds from cached hostfile
* base: centos.mirror.net.in
* extras: centos.mirror.net.in
* updates: centos.mirror.net.in
Resolving Dependencies
--> Running transaction check
---> Package epel-release.noarch 0:7-6 will be installed
--> Finished Dependency Resolution
.
.
.
Transaction test succeeded
Running transaction
Installing : epel-release-7-6.noarch 1/1
Verifying : epel-release-7-6.noarch 1/1

Installed:
epel-release.noarch 0:7-6

Complete!
 # rpm -ivh http://repo.zabbix.com/zabbix/3.0/rhel/7/x86_64/zabbix-release-3.0-1.el7.noarch.rpm
Retrieving http://repo.zabbix.com/zabbix/3.0/rhel/7/x86_64/zabbix-release-3.0-1.el7.noarch.rpm
warning: /var/tmp/rpm-tmp.Y8r8ia: Header V4 DSA/SHA1 Signature, key ID 79ea5ed4: NOKEY
Preparing... ################################# [100%]
Updating / installing...
1:zabbix-release-3.0-1.el7 ################################# [100%]
Затем настройте Mariadb и веб-сервер Apache.
 # yum install mariadb-server httpd -y
Loaded plugins: fastestmirror, langpacks
Loading mirror speeds from cached hostfile
* base: centos.webwerks.com
* epel: epel.mirror.net.in
* extras: centos.mirror.net.in
* updates: centos.mirror.net.in
zabbix 53/53
zabbix-non-supported 4/4
Resolving Dependencies
--> Running transaction check
---> Package httpd.x86_64 0:2.4.6-40.el7.centos.1 will be installed
--> Processing Dependency: httpd-tools = 2.4.6-40.el7.centos.1 for package: httpd-2.4.6-40.el7.centos.1.x86_64
.
.
.
IO-Compress.noarch 0:2.061-2.el7 perl-Net-Daemon.noarch 0:0.48-5.el7
perl-PlRPC.noarch 0:0.2020-14.el7

Dependency Updated:
mariadb-libs.x86_64 1:5.5.47-1.el7_2

Complete!
Для установки сервера Zabbix используйте следующую команду:
 # yum install zabbix-server-mysql zabbix-web-mysql mysql php -y
Loaded plugins: fastestmirror, langpacks
Loading mirror speeds from cached hostfile
* base: centos.mirror.net.in
* epel: epel.mirror.net.in
* extras: centos.mirror.net.in
* updates: centos.mirror.net.in
Package 1:mariadb-5.5.47-1.el7_2.x86_64 already installed and latest version
Resolving Dependencies
--> Running transaction check
---> Package php.x86_64 0:5.4.16-36.1.el7_2.1 will be installed
.
.
.
mysql.x86_64 0:5.4.16-36.1.el7_2.1
php-pdo.x86_64 0:5.4.16-36.1.el7_2.1 php-xml.x86_64 0:5.4.16-36.1.el7_2.1 t1lib.x86_64 0:5.1.2-14.el7
unixODBC.x86_64 0:2.3.1-11.el7 zabbix-web.noarch 0:3.0.3-1.el7

Complete!
После установки пакетов запустите и включите службы Mariadb, используя следующую команду:
 # systemctl start mariadb
# systemctl enable mariadb
ln -s '/usr/lib/systemd/system/mariadb.service' '/etc/systemd/system/multi-user.target.wants/mariadb.service'
Установите пароль рута для Mariadb.
# mysql_secure_installation
/usr/bin/mysql_secure_installation: line 379: find_mysql_client: command not found

NOTE: RUNNING ALL PARTS OF THIS SCRIPT IS RECOMMENDED FOR ALL MariaDB
SERVERS IN PRODUCTION USE! PLEASE READ EACH STEP CAREFULLY!

In order to log into MariaDB to secure it, we'll need the current
password for the root user. If you've just installed MariaDB, and
you haven't set the root password yet, the password will be blank,
so you should just press enter here.

Enter current password for root (enter for none):
OK, successfully used password, moving on...

Setting the root password ensures that nobody can log into the MariaDB
root user without the proper authorisation.

Set root password? [Y/n] y
New password:
Re-enter new password:
Password updated successfully!
Reloading privilege tables..
... Success!

By default, a MariaDB installation has an anonymous user, allowing anyone
to log into MariaDB without having to have a user account created for
them. This is intended only for testing, and to make the installation
go a bit smoother. You should remove them before moving into a
production environment.

Remove anonymous users? [Y/n] y
... Success!

Normally, root should only be allowed to connect from 'localhost'. This
ensures that someone cannot guess at the root password from the network.

Disallow root login remotely? [Y/n] y
... Success!

By default, MariaDB comes with a database named 'test' that anyone can
access. This is also intended only for testing, and should be removed
before moving into a production environment.

Remove test database and access to it? [Y/n] y
- Dropping test database...
... Success!
- Removing privileges on test database...
... Success!

Reloading the privilege tables will ensure that all changes made so far
will take effect immediately.

Reload privilege tables now? [Y/n] y
... Success!

Cleaning up...

All done! If you've completed all of the above steps, your MariaDB
installation should now be secure.

Thanks for using MariaDB!
Войдите в mariadb и выполните следующие команды для создания базы данных:
 # mysql -u root -p
Enter password:
Welcome to the MariaDB monitor. Commands end with ; or g.
Your MariaDB connection id is 10
Server version: 5.5.47-MariaDB MariaDB Server

Copyright (c) 2000, 2015, Oracle, MariaDB Corporation Ab and others.

Type 'help;' or 'h' for help. Type 'c' to clear the current input statement.

MariaDB [(none)]> create database zabbix;
Query OK, 1 row affected (0.00 sec)

MariaDB [(none)]> grant all privileges on zabbix.* to zabbix@localhost identified by 'linux';
Query OK, 0 rows affected (0.00 sec)

MariaDB [(none)]> flush privileges;
Query OK, 0 rows affected (0.00 sec)

MariaDB [(none)]> exit
Bye
Переместите следующий каталог, чтобы импортировать схему базы данных:
# cd /usr/share/doc/zabbix-server-mysql-3.0.3/
# ls
AUTHORS ChangeLog COPYING create.sql.gz NEWS README
Выполните следующую команду, чтобы извлечь файл «create.sql.gz»:
 # gunzip create.sql.gz
# ls
AUTHORS ChangeLog COPYING create.sql NEWS README
Теперь импортируйте файл create.sql в базу данных Mariadb.
 # mysql -u root -p zabbix < create.sql
Enter password:
Отредактируйте файл конфигурации zabbix, чтобы указать имя базы данных и пользователя:
# vim /etc/zabbix/zabbix_server.conf
DBHost=localhost
DBName=zabbix
DBUser=zabbix
DBPassword=linux
Настройте параметр php, отредактировав файл php.ini следующим образом:
#<span id="result_box" class="short_text" lang="ru"><span class=""> vim /etc/php.ini
Добавьте следующую запись в соответствии с требованиями вашей системы:
max_execution_time = 1200
max_input_time = 1200
memory_limit = 512M
post_max_size = 64M
upload_max_filesize = 32M
date.timezone = Europe/Russia
Разрешите некоторые порты в брандмауэре следующим образом:
 # firewall-cmd --permanent --add-port=10050/tcp
success
# firewall-cmd --permanent --add-port=10051/tcp
success
# firewall-cmd --permanent --add-port=80/tcp
success
# firewall-cmd --reload
success
Выполните следующую команду, чтобы установить правило selinux.
# setsebool -P httpd_can_connect_zabbix=1
Теперь запустите и включите службы Zabbix и httpd.
 # systemctl start zabbix-server
# systemctl enable zabbix-server
ln -s '/usr/lib/systemd/system/zabbix-server.service' '/etc/systemd/system/multi-user.target.wants/zabbix-server.service'
 # systemctl start httpd
# systemctl enable httpd
ln -s '/usr/lib/systemd/system/httpd.service' '/etc/systemd/system/multi-user.target.wants/httpd.service'
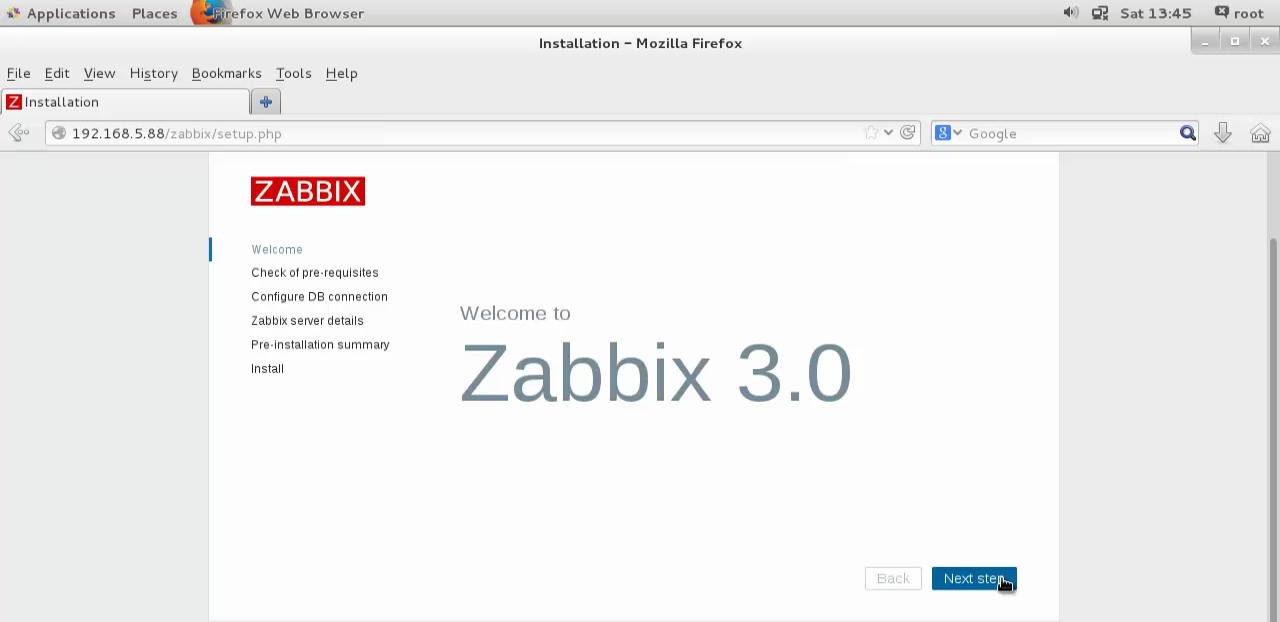
Откройте браузер и введите http: // localhost / zabbix или http: // <IP_address> / zabbix
Экран приветствия выглядит следующим образом.
Нажмите «Next step», чтобы продолжить.


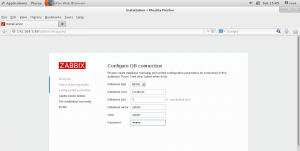
Настройте соединение MariaDB с базой данных и нажмите «NextStep».
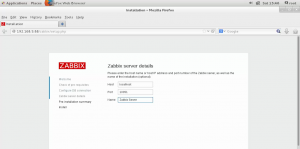
Введите данные для zabbix-сервера.
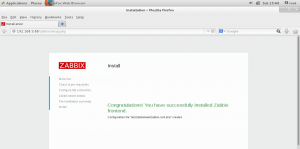
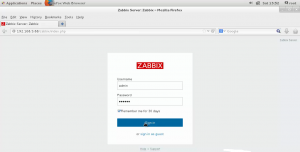
Войдите с использованием учетных данных по умолчанию
Имя пользователя = admin Пароль = zabbix