Observium – приложение для мониторинга.
Он обеспечивает сетевое наблюдение с помощью PHP / MySQL, которое поддерживает широкий спектр операционных систем / аппаратных платформ, таких как Linux, Windows, FreeBSD и Cisco.
Он направлен на дополнение других проектов сетевого мониторинга, таких как Nagios или Cacti.
Он обеспен надежным и простым веб-интерфейсом для мониторинга производительности вашей сети.
Установка и настройка объясняются в этой статье.
Как добавить RPM Forge и EPEL Repositories
RPMForge и EPEL – это репозиторий, который предоставляет множество программных пакетов для RHEL и CentOS.
Для систем i386
 # wget http://pkgs.repoforge.org/rpmforge-release/rpmforge-release-0.5.3-1.el5.rf.i386.rpm
# wget http://download.fedoraproject.org/pub/epel/6/i386/epel-release-6-8.noarch.rpm
# wget http://apt.sw.be/RPM-GPG-KEY.dag.txt
# rpm --import RPM-GPG-KEY.dag.txt
# rpm -Uvh rpmforge-release-0.5.3-1.el5.rf.i386.rpm
# rpm -Uvh epel-release-6-8.noarch.rpm
Для систем x86_64
Загрузите пакет rpm и ключ GPG.
 # wget http://pkgs.repoforge.org/rpmforge-release/rpmforge-release-0.5
--2016-06-09 14:15:16-- http://apt.sw.be/redhat/el6/en/x86_64/rpmforge/RPMS/rpmforge-release-0.5.3-1.el6.rf.x86_64.rpm
Resolving apt.sw.be... 193.1.193.67
Connecting to apt.sw.be|193.1.193.67|:80... connected.
HTTP request sent, awaiting response... 200 OK
Length: 12640 (12K) [application/x-redhat-package-manager]
Saving to: “rpmforge-release-0.5.3-1.el6.rf.x86_64.rpm”

100%[===================================================================================================>] 12,640 --.-K/s in 0.01s

2016-06-09 14:15:17 (982 KB/s) - “rpmforge-release-0.5.3-1.el6.rf.x86_64.rpm” saved [12640/12640]
 # wget http://epel.mirror.net.in/epel/6/x86_64/epel-release-6-8.noarch.rpm
--2016-06-09 14:16:06-- http://epel.mirror.net.in/epel/6/x86_64/epel-release-6-8.noarch.rpm
Resolving epel.mirror.net.in... 103.195.68.253, 103.240.105.131
Connecting to epel.mirror.net.in|103.195.68.253|:80... connected.
HTTP request sent, awaiting response... 200 OK
Length: 14540 (14K) [application/x-redhat-package-manager]
Saving to: “epel-release-6-8.noarch.rpm.1”

100%[===================================================================================================>] 14,540 --.-K/s in 0.04s

2016-06-09 14:16:07 (344 KB/s) - “epel-release-6-8.noarch.rpm.1” saved [14540/14540]
 # wget http://apt.sw.be/RPM-GPG-KEY.dag.txt
--2016-06-09 14:16:26-- http://apt.sw.be/RPM-GPG-KEY.dag.txt
Resolving apt.sw.be... 193.1.193.67
Connecting to apt.sw.be|193.1.193.67|:80... connected.
HTTP request sent, awaiting response... 200 OK
Length: 1672 (1.6K)
Saving to: “RPM-GPG-KEY.dag.txt”

100%[===================================================================================================>] 1,672 --.-K/s in 0s

2016-06-09 14:16:27 (136 MB/s) - “RPM-GPG-KEY.dag.txt” saved [1672/1672]
Теперь импортируйте ключи GPG и установите пакеты rpm.
 # rpm --import RPM-GPG-KEY.dag.txt
# rpm -Uvh rpmforge-release-0.5.3-1.el6.rf.x86_64.rpm
Preparing... ########################################### [100%]
 1:rpmforge-release ########################################### [100%]
[root@linuxhelp1 ~]# rpm -Uvh epel-release-6-8.noarch.rpm.1
warning: epel-release-6-8.noarch.rpm.1: Header V3 RSA/SHA256 Signature, key ID 0608b895: NOKEY
Preparing... ########################################### [100%]
 1:epel-release ########################################### [100%]
Установка пакетов программного обеспечения
Установите необходимые пакеты программного обеспечения, выполнив следующую команду.
 # yum install httpd php php-mysql php-gd php-snmp vixie-cron php-mcrypt php-pear net-snmp net-snmp-utils graphviz subversion mysql-server mysql rrdtool fping ImageMagick jwhois nmap ipmitool php-pear.noarch MySQL-python -y
Loaded plugins: fastestmirror, refresh-packagekit, security
Setting up Install Process
Loading mirror speeds from cached hostfile
 * base: centos.excellmedia.net
 * epel: epel.mirror.net.in
 * extras: centos.excellmedia.net
 * rpmforge: mirror.oscc.org.my
 * updates: centos.excellmedia.net
Package httpd-2.2.15-53.el6.centos.x86_64 already installed and latest version
Package cronie-1.4.4-15.el6_7.1.x86_64 already installed and latest version
Resolving Dependencies
--> Running transaction check
---> Package ImageMagick.x86_64 0:6.7.2.7-4.el6_7 will be installed
--> Processing Dependency: libwmflite-0.2.so.7()(64bit) for package: ImageMagick-6.7.2.7-4.el6_7.x86_64
--> Processing Dependency: libwmf-0.2.so.7()(64bit) for package: ImageMagick-6.7.2.7-4.el6_7.x86_64
--> Processing Dependency: libImath.so.6()(64bit) for package: ImageMagick-6.7.2.7-4.el6_7.x86_64
.
.
.
Dependency Installed:
 OpenEXR-libs.x86_64 0:1.6.1-8.1.el6 dejavu-lgc-sans-mono-fonts.noarch 0:2.33-1.el6 gd.x86_64 0:2.0.35-11.el6
 ilmbase.x86_64 0:1.0.1-6.1.el6 libXaw.x86_64 0:1.0.11-2.el6 libXpm.x86_64 0:3.5.10-2.el6
 libmcrypt.x86_64 0:2.5.8-9.el6 libwmf.x86_64 0:0.2.8.4-25.el6_7 libwmf-lite.x86_64 0:0.2.8.4-25.el6_7
 perl-DBD-MySQL.x86_64 0:4.013-3.el6 perl-DBI.x86_64 0:1.609-4.el6 perl-URI.noarch 0:1.40-2.el6
 php-cli.x86_64 0:5.3.3-47.el6 php-common.x86_64 0:5.3.3-47.el6 php-pdo.x86_64 0:5.3.3-47.el6

Complete!

Install "libvirt" package, to monitor virtual machines.

[root@linuxhelp1 ~]# yum install libvirt -y
Loaded plugins: fastestmirror, refresh-packagekit, security
Setting up Install Process
Loading mirror speeds from cached hostfile
 * base: centos.excellmedia.net
 * epel: epel.mirror.net.in
 * extras: centos.excellmedia.net
 * rpmforge: mirror.oscc.org.my
 * updates: centos.excellmedia.net
Resolving Dependencies
--> Running transaction check
---> Package libvirt.x86_64 0:0.10.2-60.el6 will be installed
.
.
.
Installed:
 libvirt.x86_64 0:0.10.2-60.el6

Dependency Installed:
 ebtables.x86_64 0:2.0.9-6.el6 glusterfs.x86_64 0:3.7.5-19.el6 glusterfs-api.x86_64 0:3.7.5-19.el6
 glusterfs-client-xlators.x86_64 0:3.7.5-19.el6 glusterfs-libs.x86_64 0:3.7.5-19.el6 gnutls-utils.x86_64 0:2.8.5-19.el6_7
 iscsi-initiator-utils.x86_64 0:6.2.0.873-21.el6 libcgroup.x86_64 0:0.40.rc1-17.el6_7 libvirt-client.x86_64 0:0.10.2-60.el6
 lzop.x86_64 0:1.02-0.9.rc1.el6 nc.x86_64 0:1.84-24.el6 netcf-libs.x86_64 0:0.2.4-4.el6
 numad.x86_64 0:0.5-12.20150602git.el6 qemu-img.x86_64 2:0.12.1.2-2.491.el6_8.1 radvd.x86_64 0:1.6-1.el6
 usbredir.x86_64 0:0.5.1-3.el6 yajl.x86_64 0:1.0.7-3.el6

Complete!
Скачать Observium
Сначала вам нужно развернуть его в каталоге /opt и убедиться, что все работает хорошо, тогда вы можете установить его в нужное место.
Если у вас есть активная подписка, используйте SVN-репозитории для загрузки последней версии.
Аккаунт подписки действителен только для одной установки и двух установок разработки с ежедневными исправлениями и исправлениями ошибок.
Чтобы загрузить последнюю версию, на компьютере должен быть установлен пакет svn, чтобы получить файлы из репозитория SVN.
Версия для разработки
# svn co http://svn.observium.org/svn/observium/trunk obsium
# # svn co http://svn.observium.org/svn/observium/branches/stable observium
 # cd /opt

# wget http://www.observium.org/observium-community-latest.tar.gz
--2016-06-09 14:27:44-- http://www.observiuum.org/observium-community-latest.tar.gz
Resolving www.observium.org... 37.59.0.47
Connecting to www.observium.org|37.59.0.47|:80... connected.
HTTP request sent, awaiting response... 200 OK
Length: 50107759 (48M) [application/x-gzip]
Saving to: “observium-community-latest.tar.gz”

100%[===================================================================================================>] 50,107,759 319K/s in 4m 24s

2016-06-09 14:32:10 (185 KB/s) - “observium-community-latest.tar.gz” saved [50107759/50107759]
 # tar zxvf observium-community-latest.tar.gz
observium/
obser vium/templates/
observium/templates/group/
observium/templates/notification/
observium/templates/alert/
observium/templates/README
.
.
.
obser vium/update/260.php
obser vium/update/184.sql
observium/update/087.sql
observium/update/080.sql
Создание базы данных MySQL
Задайте новый пароль root с помощью следующей команды.
 # service mysqld start
Initializing MySQL database: Installing MySQL system tables...
OK
Filling help tables...
OK

To start mysqld at boot time you have to copy
support-files/mysql.server to the right place for your system

PLEASE REMEMBER TO SET A PASSWORD FOR THE MySQL root USER !
To do so, start the server, then issue the following commands:

/usr/bin/mysqladmin -u root password 'new-password'
/usr/bin/mysqladmin -u root -h linuxhelp1 password 'new-password'

Alternatively you can run:
/usr/bin/mysql_secure_installation
which will also give you the option of removing the test
databases and anonymous user created by default. This is
strongly recommended for production servers.

See the manual for more instructions.

You can start the MySQL daemon with:
cd /usr ; /usr/bin/mysqld_safe &

You can test the MySQL daemon with mysql-test-run.pl
cd /usr/mysql-test ; perl mysql-test-run.pl

Please report any problems with the /usr/bin/mysqlbug script!

[ OK ]
Starting mysqld: [ OK ]
# /usr/bin/mysqladmin -u root password 'linuxc'
Теперь войдите в интерфейс mysql, а затем создайте новую базу данных.
 # mysql -u root -p
Enter password:
Welcome to the MySQL monitor. Commands end with ; or g.
Your MySQL connection id is 3
Server version: 5.1.73 Source distribution

Copyright (c) 2000, 2013, Oracle and/or its affiliates. All rights reserved.

Oracle is a registered trademark of Oracle Corporation and/or its
affiliates. Other names may be trademarks of their respective
owners.

Type 'help;' or 'h' for help. Type 'c' to clear the current input statement.
mysql> CREATE DATABASE observium;
Query OK, 1 row affected (0.00 sec)

mysql>mysql> GRANT ALL PRIVILEGES ON observium.* TO 'observium'@'localhost' IDENTIFIED BY 'linuxc';
Query OK, 0 rows affected (0.00 sec)

mysql>mysql> FLUSH PRIVILEGES;
Query OK, 0 rows affected (0.00 sec)

mysql>mysql> exit;
Bye
Как настроить Observium
Скопируйте конфигурационный файл по умолчанию «config.php.default» в «config.php» и измените настройки, как указано ниже.
 # cd observium/
# cp config.php.default config.php
Откройте файл «config.php» и введите данные MySQL, такие как имя базы данных, имя пользователя и пароль.
# vim config.php

$config['db_extension'] = 'mysqli';
$config['db_host'] = 'localhost';
$config['db_user'] = 'observium';
$config['db_pass'] = 'linuxc';
$config['db_name'] = 'observium';
Add an entry for fping binary location to "config.php" and in RHEL distribution the location will be different.

$config['fping'] = "/usr/sbin/fping";
 # ./discovery.php -u

No log handling enabled - turning on stderr logging
Created directory: /var/lib/net-snmp/mib_indexes

___ _ _
 / _ | |__ ___ ___ _ __ __ __(_) _ _ _ __ ___
| | | || '_ / __| / _ | '__| / /| || | | || '_ ` _
| |_| || |_) |\__ | __/| | V / | || |_| || | | | | |
 \___/ |_.__/ |___/ \___||_| \_/ |_| \__,_||_| |_| |_|
 Observium Community Edition 0.16.1.7533
 http://www.observium.org

Install initial database schema ... done.
-- Updating database/file schema
252 -> 253 ... (db) done.
253 -> 254 ... (db) done.
254 -> 255 ... (db) done.
255 -> 256 ... (php)
256 -> 257 ... (php)
257 -> 258 ... (php)
258 -> 259 ... (db) done.
259 -> 260 ... (php)
260 -> 261 ... (db) done.
261 -> 262 ... (php)
262 -> 263 ... (db) done.
263 -> 264 ... (db) done.
264 -> 265 ... (db) done.
265 -> 266 ... (db) done.
-- Done.
Как настроить Apache
 # mkdir rrd
# chown apache:apache rrd
Выполните следующую команду для настройки базы данных MySQL и добавьте схему файлов по умолчанию в базу данных.
# vim /etc/httpd/conf/httpd.conf
Включите раздел Virtualhost и добавьте следующую директиву виртуального хоста в нижней части файла.
 DocumentRoot /opt/observium/html/
ServerName observium.domain.com
CustomLog /opt/observium/logs/access_log combined
ErrorLog /opt/observium/logs/error_log
<Directory "/opt/observium/html/">
AllowOverride All
Options FollowSymLinks MultiViews
Создайте каталог «logs» для Apache и примените права владельца Apache для записи журналов для ведения журналов.
 # mkdir logs
# chown apache:apache /opt/observium/logs/
Создать пользователя Admin
Добавьте первого пользователя и дайте 10 в качестве уровня для администратора, а затем замените имя пользователя и пароль.
 # ./adduser.php root linuxc 10
Observium CE 0.16.1.7533
Add User
User root added successfully.
 # ./discovery.php -h all___ _ _
/ _ | |__ ___ ___ _ __ __ __(_) _ _ _ __ ___
| | | || '_ / __| / _ | '__| / /| || | | || '_ ` _
| |_| || |_) |\__ | __/| | V / | || |_| || | | | | |
\___/ |_.__/ |___/ \___||_| \_/ |_| \__,_||_| |_| |_|
Observium Community Edition 0.16.1.7533
http://www.observium.org

-- Database is up to date.
##### Starting discovery run at 2016-06-09 15:05:18 #####

##### Finished discovery run at 2016-06-09 15:05:19 #####

o Devices Discovered 0
o Discovery Time 3.386 secs
o Memory usage 8.75MB (peak: 8.75MB)
o MySQL Usage Cell[27/0.005s] Row[5/0.002s] Rows[6/0.049s] Column[0/0s] Update[4/0.898s] Insert[0/0s] Delete[0/0s]
o RRDTool Usage
# ./poller.php -h all

___ _ _
/ _ | |__ ___ ___ _ __ __ __(_) _ _ _ __ ___
| | | || '_ / __| / _ | '__| / /| || | | || '_ ` _
| |_| || |_) |\__ | __/| | V / | || |_| || | | | | |
\___/ |_.__/ |___/ \___||_| \_/ |_| \__,_||_| |_| |_|
Observium Community Edition 0.16.1.7533
http://www.observium.org

##### Starting polling run at 2016-06-09 15:05:33 #####

WARNING: 0 devices polled. Did you specify a device that does not exist?
##### Completed polling run at 2016-06-09 15:05:33 #####

o Devices Polled 0
o Poller Time 0.016 secs
o Memory usage 8.5MB (peak: 8.5MB)
o MySQL Usage Cell[0/0s] Row[5/0.001s] Rows[3/0.012s] Column[0/0s] Update[0/0s] Insert[0/0s] Delete[0/0s]
o RRDTool Usage
Затем создайте новый файл и добавьте следующее содержимое для задания заданий cron.
 # vim /etc/cron.d/observium

55 */3 * * * root /opt/observium/discovery.php -h all >> /dev/null 2>&1
*/8 * * * * root /opt/observium/discovery.php -h new >> /dev/null 2>&1
*/8 * * * * root /opt/observium/poller-wrapper.py 1 >> /dev/null 2>&1
Перезагрузите cron-процесс, чтобы добавить новые записи.
 # /etc/init.d/crond reload
Reloading crond: [ OK ]
Последним шагом является добавление httpd, а также служб mysqld в систему, чтобы автоматически начинаться после загрузки компьютера.
 # chkconfig mysqld on
# chkconfig httpd on
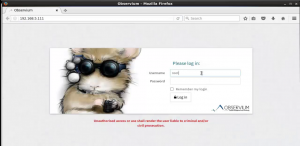
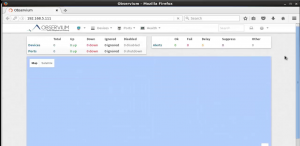
Откройте браузер и перейдите к http: // <Ip-Address>